Unleashing Your Inner Artist: 7 Delightful Ways to Decorate Ceramics with Slips and Engobes

Hey there, fellow art enthusiasts! It’s Susan, your friendly neighborhood craft enthusiast, back with another exciting deep dive into the mesmerizing world of ceramics. Today, we’re going to explore the magic of slips and engobes – those versatile decorating tools that can transform your pottery from simple to simply stunning!
Whether you’re a seasoned potter or just starting your clay journey, get ready to be inspired by these seven fun and accessible techniques. We’ll unravel the mysteries of slips and engobes, learn how to use them, and discover the endless creative possibilities they offer.
Let’s get those creative juices flowing!
Understanding the Basics: Slips and Engobes
Before we jump into the exciting world of decorating, let’s take a moment to understand what makes slips and engobes so special.
Slips: Imagine liquid clay, smooth and ready to paint. That’s essentially what a slip is! Primarily made by mixing clay with water, slips are typically applied to wet or leather-hard greenware (unfired pottery). They can be used to:
- Add a pop of color: Just like paint, slips come in a rainbow of hues. Add oxides, carbonates, or stains to create your own custom palette.
- Create a smooth canvas: Slips can even out the texture of your pottery, providing a flawless base for further decoration.
- Experiment with layering: Layer different colored slips for depth and dimension.
Engobes: Think of engobes as the sophisticated older sibling of slips. They contain less clay and often include other ingredients like fluxes, fillers, and opacifiers. This unique composition allows engobes to be used on both greenware and bisque-fired pottery.
Here’s what makes engobes so versatile:
- Unlimited decorating options: Use them on wet, leather-hard, or even bisque-fired pottery.
- Glaze-like effects: Engobes can create stunning matte or satin finishes, even without a glaze.
- Endless color possibilities: Just like slips, you can add colorants to create a spectrum of shades.
Remember: While the terms “slip” and “engobe” are often used interchangeably, understanding their subtle differences can open up a world of creative possibilities.
7 Techniques to Spark Your Creativity
Now that you’re familiar with the basics, let’s dive into the fun part – decorating! Here are seven techniques to get you started:
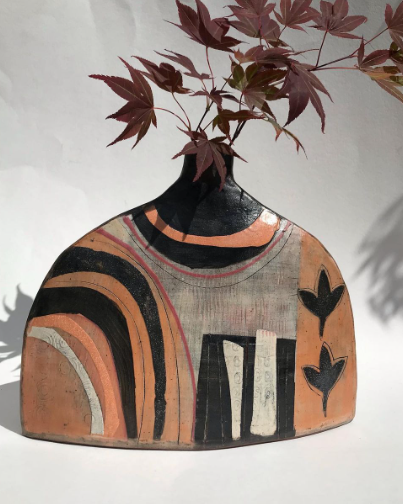
1. Painting with Slips and Engobes
This is a great starting point for beginners. Simply use a brush to apply slips or engobes onto your pottery, just like you would with paint. You can create:
- Bold patterns: Geometric designs, floral motifs, abstract art – let your imagination run wild!
- Delicate details: Use fine-tipped brushes for intricate line work and delicate patterns.
- Layered effects: Apply multiple layers of different colored slips or engobes for depth and visual interest.
2. Dipping and Pouring
For a quick and even coating, try dipping your pottery into a bath of slip or engobe. This technique is perfect for:
- Solid color pieces: Achieve a uniform color across your entire piece.
- Creating gradients: Dip your piece at different depths or angles to create stunning color transitions.
- Layering colors: Dip your piece in multiple colors for a layered, marbled effect.
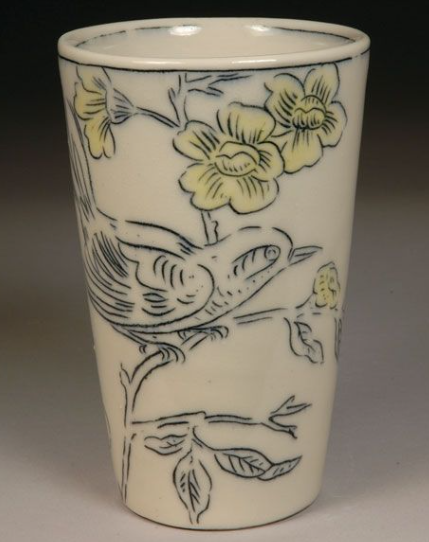
3. Sgraffito: Scratching the Surface
Sgraffito, meaning “to scratch” in Italian, is a captivating technique where you apply a layer of slip or engobe and then scratch through it to reveal the clay body beneath. This method allows you to create:
- Intricate designs: From delicate floral patterns to bold geometric motifs, the possibilities are endless.
- Textural effects: Experiment with different scratching tools to create a variety of lines and textures.
- Contrasting colors: Choose contrasting slip and clay body colors for a dramatic effect.
4. Slip Trailing: Drawing with Clay
Slip trailing involves applying slip through a nozzle, much like decorating a cake! This technique is perfect for:
- Adding fine details: Create delicate lines, dots, and patterns with precision.
- Building up textures: Layer slip trails to create raised designs and textures.
- Combining with other techniques: Use slip trailing in conjunction with sgraffito or painting for unique effects.
5. Stenciling: Pattern Perfection
For those who love clean lines and repeating patterns, stenciling is a fantastic option. Simply place a stencil on your pottery and apply slip or engobe over it. You can use:
- Purchased stencils: Find a wide variety of pre-made stencils online or at craft stores.
- DIY stencils: Create your own custom stencils using paper, cardboard, or even lace.
- Multiple layers: Layer different colored slips or engobes with stencils for a multi-dimensional effect.
6. Resist Techniques: Masking Magic
Resist techniques involve applying a material that prevents slip or engobe from adhering to the clay body. Popular resist materials include:
- Wax resist: Apply melted wax with a brush or use wax-resist crayons for drawing directly onto your pottery.
- Latex resist: Use liquid latex to create bold shapes or intricate patterns.
- Paper resist: Cut out shapes from paper and adhere them to your pottery before applying slip or engobe.
Once the slip or engobe is dry, remove the resist material to reveal the design.
7. Marbling: Creating Fluid Patterns
Marbling involves swirling together different colored slips or engobes to create beautiful, organic patterns. You can marble your pottery by:
- On-the-pot marbling: Pour different colored slips directly onto your pottery and swirl them together with a tool.
- Water marbling: Create a marbled pattern on the surface of water and then carefully dip your pottery into it.
No matter which technique you choose, remember to have fun and embrace the experimental nature of working with slips and engobes.
Essential Tips for Success
Here are a few additional tips to help you achieve stunning results:
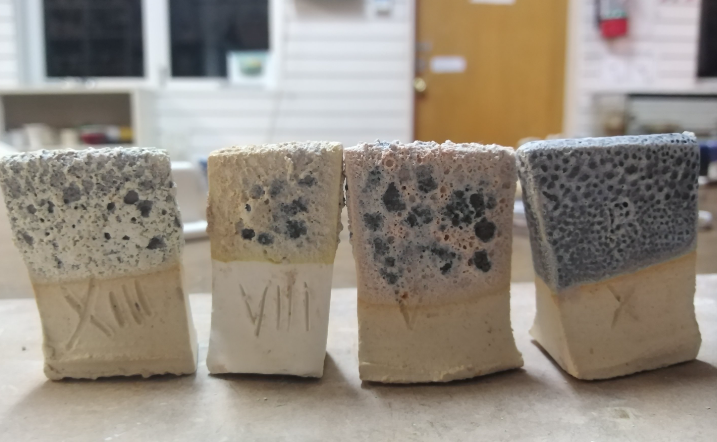
- Start with a test tile: Before decorating your final piece, experiment with different techniques and color combinations on a test tile. This will help you avoid any surprises and ensure you’re happy with the final result.
- Apply slips and engobes evenly: Uneven application can lead to cracking or flaking during firing. Use thin, even coats and allow each layer to dry completely before applying the next.
- Handle with care: Slips and engobes can be delicate, especially when wet. Handle your decorated pottery with care to avoid smudging or damaging the design.
- Experiment with firing temperatures: The firing temperature can affect the final color and texture of your slips and engobes. Experiment with different firing temperatures to achieve the desired results.

Resources for Further Exploration:
- Ceramic Arts Network: https://ceramicartsnetwork.org/ – A treasure trove of information, tutorials, and inspiration for ceramic artists of all levels.
- The Spruce Crafts: https://www.thesprucecrafts.com/ – Offers a wide range of articles and videos on various craft techniques, including ceramics.
- Your Local Pottery Studio: Many pottery studios offer classes and workshops on slip decorating techniques. This is a great way to learn from experienced instructors and connect with other ceramic enthusiasts.
Embrace the Journey
Decorating with slips and engobes is a journey of discovery. Don’t be afraid to experiment, make mistakes, and learn along the way. The most important thing is to have fun and let your creativity shine through!
Happy potting, everyone!
With love,
Susan


Post Comment